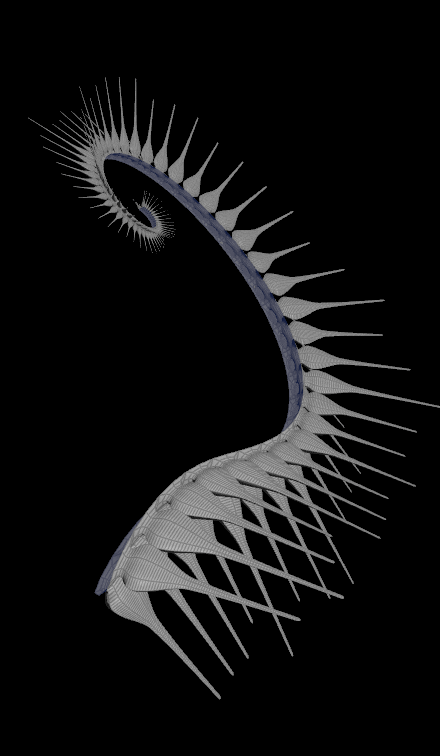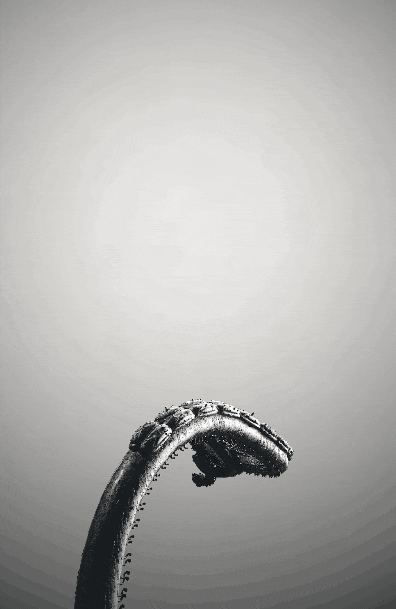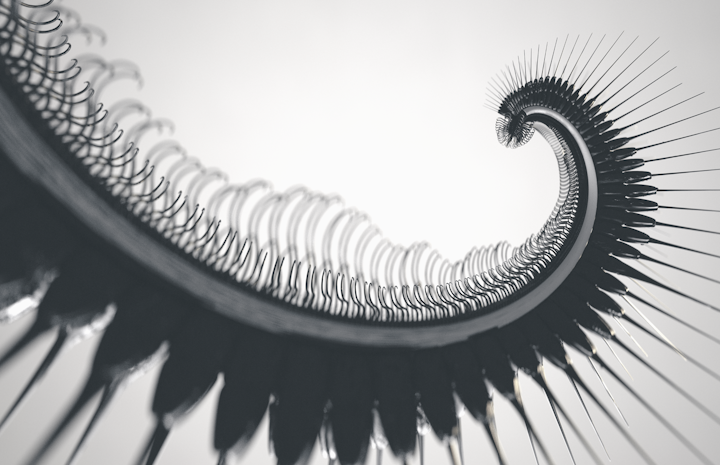
The aim of this project was to explore an uncoiling motion while designing structures that can be layered to elevate the immediate abstraction of uncoiling to be a spiral. It can be done through robust ways like having a cumulative transform by recursively shifting the rotation’s anchor point along a curve to make a basic unrolling rig. But here, it is done quite simply by combining L systems with a custom asset that rotates a curve’s points around the origin using quaternions and an axis. The modelling and layering of structures benefits a lot from using NURBS, carves and being intentional with how detail is placed along the curve. The details are not copies, they are entirely extrusions controlled by an effector ramp and the same L system that makes the larger structure.
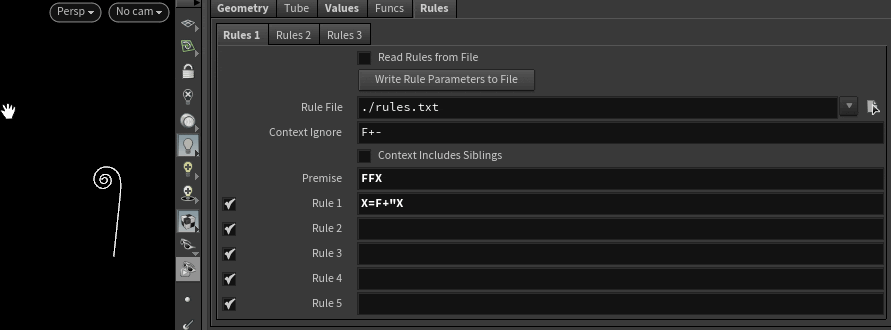
The first step was to get the basic uncoiling motion to work. This was done using an animated L system. The rules are simple to figure out keeping in mind that any basic spiral structure is a combination of rotation and incremental distances (radial acceleration). The curve rotates with every generation and scales down its length. Subdivide the curve to get an almost exponential distribution of points along the curve which will come in handy when later fleshing out the structures around it. Resample it only if regular point spacing along the curve is needed.
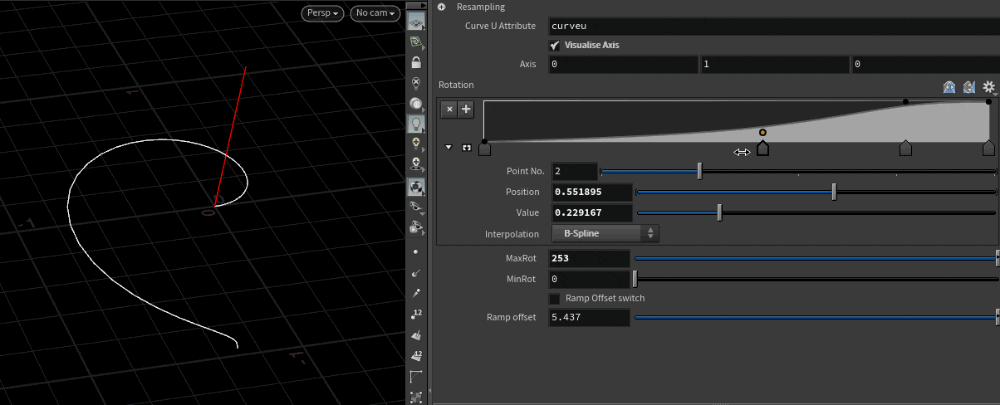
The next was building an asset that helps in rotating the points of the curve. This helps add some controlled variation and interest to the base uncoiling motion. Further smaller tweaking can be done by using Houdini 18’s new Bend SOP which is very co-operative now.
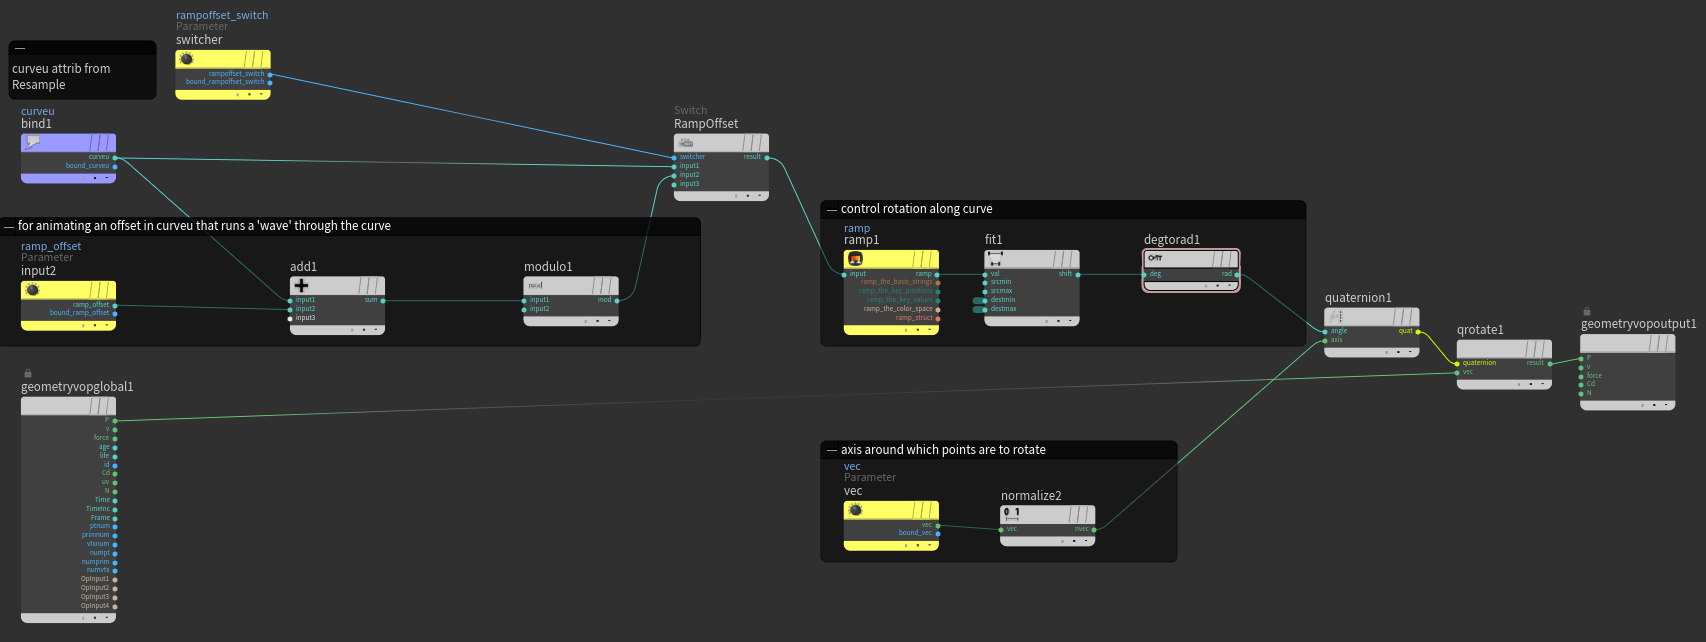
Combining these assets, the base curve was animated to uncoil.
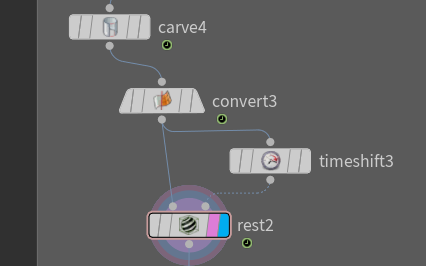
Once the base curve is animated to uncoil, this can be made into a mesh using a combination of sweep (with UVs), carve and polyextrudes. The extrusions are based on a ramp driven by the UVs of the surface. The ramp can be animated to add slight offsets in the growth of the structure. Repeating this process over and over for different parts of the curve helps in navigating the mesh and layering it with secondary and tertiary details as required. Using a rest attribute can helps any other attributes to carry along with the animated mesh.
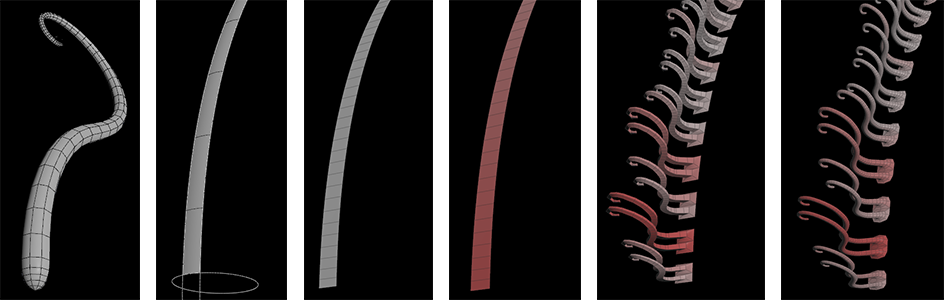
This process is iteratively repeated across the mesh to populate areas of detail.